simple spanakopita

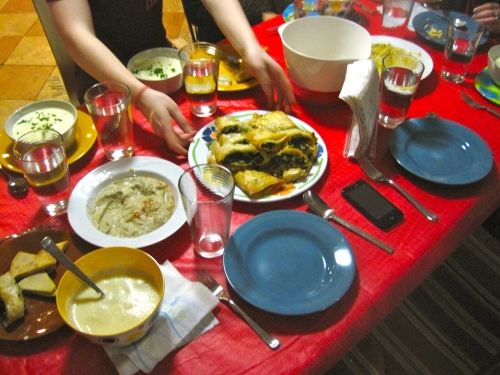
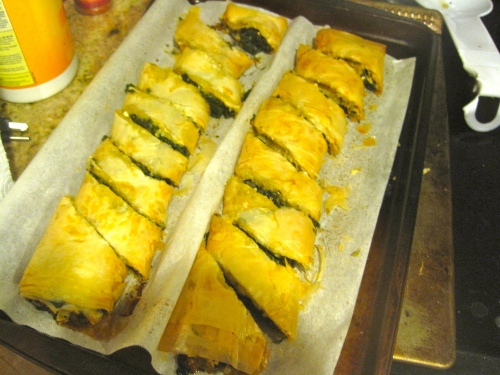
I love small plates, family style dinners because they offer variety to suit all tastes, can easily be scaled up or down to accommodate unplanned dinner guests, and allow you to experiment with different recipes and cuisines. One of my favorite house dinners this past year was our Greek inspired night: spanakopita (spinach phyllo pie), avgolemono soup (greek chicken lemon soup), roasted eggplant dip, and toasted pita. The spanakopita looks super impressive but is simple to prepare with the help of olive oil spray, and I promise the phyllo dough isn’t as difficult to work with as everyone makes it out to be! It just takes a little bit of practice, like anything else. The spinach filling is jazzed up with the addition of feta and golden raisins, which give it a nice sweetness in contrast to the savory garlic and spinach. Other great additions to round out this meal include roasted eggplant dipmarinated peppers, celery and orange salad, spicy carrot salad and melon with honeyed yogurt, which all come from the June 2009 Everyday Food magazine!

simple spanakopita

Adapted from Martha Stewart

ingredients:

  • 2 tablespoons olive oil
  • olive oil cooking spray
  • 1 medium onion, finely chopped
  • 3 large garlic cloves, minced
  • 2 packages (20 ounces each) baby spinach
  • 1 cup crumbled feta (4 ounces)
  • 1/4 cup golden raisins, chopped
  • Coarse salt and ground pepper
  • 20 sheets frozen phyllo dough (from an 8-ounce package), thawed and cut to 8 by 12 inches

directions:

In a medium pan, heat oil over medium-high. Add onion and cook until golden, about 4 minutes. Add garlic and cook until fragrant, 1 minute. Transfer to a large bowl. Return pan to heat. Working in batches, cook spinach, tossing, until wilted, about 1 minute. Drain spinach and let cool. Press out excess moisture, then roughly chop. Add spinach, feta, and raisins to bowl with onion and season filling with salt and pepper. (To store, refrigerate, up to 2 days.)

Preheat oven to 350 degrees. Unroll phyllo. Place 1 sheet on a work surface (keep remaining sheets covered with a damp kitchen towel to prevent drying); spray with oil. Lay another sheet on top and spray with oil. Repeat until you have 10 layers of phyllo.

Spread half of filling lengthwise down middle of phyllo stack.

Roll into a log, brushing the seam with oil before sealing.

Spray log with oil. Using a small sharp knife, make 8 diagonal cuts on top. Repeat with remaining phyllo and filling.

Place logs, seam side down, on a parchment-lined baking sheet. Bake until deep golden brown, 45 to 50 minutes. Cut into slices along slashes. Serve warm or at room temperature.

I served it with Avgolemono soup too: 

Bon Appetit!

strawberry shortcake

More summer strawberry recipes!

My sister always had strawberry shortcake birthday cakes when she was little, and I have had a soft spot in my heart for it ever since. I have made this recipe so many times because it’s easy, comes together quickly and is always a huge hit at parties and dinners. I like to slice the strawberries first because the longer they sit in sugar, the softer and more juicy they get, and the strawberry juice is so good when it soaks into the cake layers. This recipe has you make one layer and then slice into two, but if you need it bigger you can always double the recipe and make 2 layers into 4. I like to make the whipped cream nice and fluffy and serve the cake stacked up tall on a cake stand. It will impress your friends and the leftovers taste even better the next day (although good luck having any left over)!

strawberry shortcake

Adapted from Martha Stewart

ingredients

  • 1/2 cup (1 stick) unsalted butter, room temperature, plus more for pan
  • 1 1/2 cups all-purpose flour (spooned and leveled), plus more for pan
  • 2 teaspoons baking powder
  • 1/2 teaspoon salt
  • 1 cup sugar
  • 2 large eggs plus 2 large egg yolks
  • 1/2 teaspoon pure vanilla extract
  • 1/2 cup whole milk
  • 1 pound strawberries, hulled and thinly sliced
  • 1 teaspoon unflavored gelatin (from a 1/4-ounce envelope)
  • 1 1/2 cups heavy cream
directions:
  1. Preheat oven to 350 degrees. Butter bottom of an 8-inch round cake pan, and line with parchment paper. Butter and flour paper and sides. In a medium bowl, whisk together flour, baking powder, and salt; set aside.
  2. Using an electric mixer on high speed, beat butter and 1/2 cup sugar in a large bowl until light and fluffy. Add eggs and yolks, one at a time, beating well after each addition. Beat in vanilla. With mixer on low, alternately add flour mixture in 3 parts and milk in 2, beginning and ending with flour mixture; mix just until combined. Spread batter in prepared pan.
  3. Bake until a toothpick inserted in center of cake comes out clean, 30 to 35 minutes. Cool in pan 10 minutes; invert onto a wire rack to cool completely. Using a serrated knife, split cake in half horizontally; place bottom half, cut side up, on a serving plate.
  4. Make topping: In a large bowl, combine strawberries and 1/4 cup sugar; set aside.
  5. Using an electric mixer, beat cream and remaining 1/4 cup sugar in a large bowl until very soft peaks form. Continue to beat until soft peaks form (add cream of tartar if necessary).
  6. Arrange half of strawberries over bottom cake layer; top with half of whipped cream, leaving a 1-inch border. Cover with top half of cake, cut side down. Top cake with remaining whipped cream, leaving a 1-inch border. Refrigerate cake and remaining strawberries separately, at least 1 hour (or up to 1 day). Just before serving, spoon strawberries over cake.

summer potlucks 🙂

Bon Appetit!

light seven layer dip

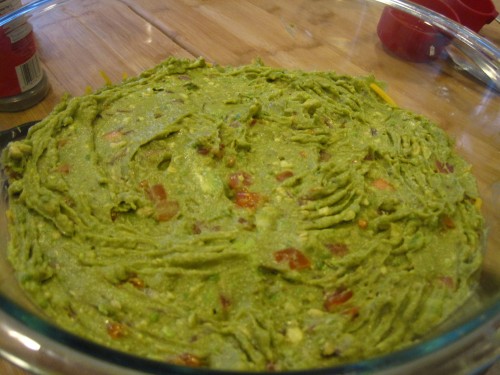
I made this dip for the first time during the Superbowl this year and it was such a hit that I’ve been asked to make it again for almost every party I’ve had since. It looks really great in a clear glass bowl because you can see all of the layers, which I’ve tried to photograph for you to see. It’s really filling, and is a great way to put together the cheese, beans, guacamole, salsa, and cilantro that you would have already bought for any Mexican fiesta. This can be scooped up with chips or used as a topping or filling for tacos, quesadillas, burritos and more. I usually make the guacamole and salsa myself, but this can also be made in a pinch by buying premade guacamole, salsa and pre-shredded cheese. Enjoy!

seven layer dip

Adapted from Ezra Pound Cake

Layer 1: Beans

  • 2, 16-oz cans black beans (or 1 can black beans and 1 can pinto beans), drained
  • 1 teaspoon chili powder
  • pinch of salt

Combine the beans, chili powder and salt in a small bowl. Mash lightly with a fork, if you like. Transfer the beans to an 8-inch square dish or glass bowl of a similar size.

Layer 2: Sour Cream and Cheese

  • 1 cup light sour cream (or greek yogurt)
  • 2 cups freshly grated cheese (cheddar or pepper jack)

In a small bowl, stir together the sour cream and cheese. Spread the mixture evenly over the bean layer.

Layer 3: Guacamole

  • 2 avocados, halved, seeded and peeled
  • juice of 1/2 lime
  • 1 clove garlic, minced
  • 1/4 cup diced red onion
  • 1 tomato, cored, seeded and diced

Mash avocados, lime juice, garlic and salt. Stir in the red onion and tomatoes. Taste and adjust the seasonings. Spread the guacamole over the sour cream mixture.

Layer 4: Simple Salsa

  • 3 large tomatoes, cored, seeded and diced
  • 2 jalapeños, seeded and minced
  • 1 to 2 tablespoons chopped fresh cilantro

In a medium bowl, combine the tomatoes, jalapeños and fresh cilantro. Layer the salsa over the guacamole.

Layers 5, 6 & 7:

  • 6 scallions, thinly sliced
  • Chopped fresh cilantro
  • Up to 1/4 cup grated cheese (cheddar or pepper jack)

Sprinkle scallions over the salsa. Add as much cilantro confetti as you like. Top the scallions with the cheese of your choice.

Suggestion: Serve this with a big spoon so that people can scoop all the way down to the beans.

Now kick back and have a corona, it’s mexican fiesta time!

strawberry rhubarb crisp

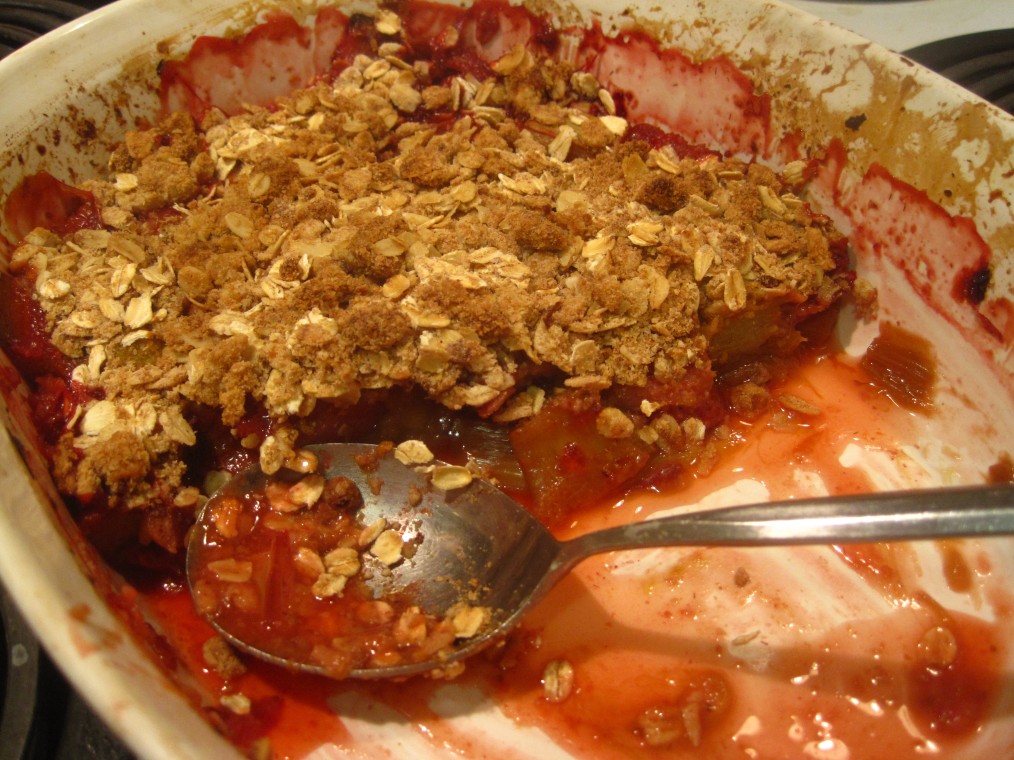
When the bright red strawberries and magenta stalks of rhubarb start showing up in mass at the farmers market I know that summer has really begun. There is something so comforting and delicious about the combination of sweet strawberries and bitter rhubarb, cooked down to a mush, tucked away under a pie crust, or in this case, under a delicious crumble topping. A while back I posted a recipe for rhubarb compote, which is another great way to use rhubarb, and is delicious spooned over greek yogurt or over vanilla frozen yogurt.

This recipe is not only yummy but it’s good for you too! My mom is on weight watchers so while home I’ve been on the hunt for diet friendly recipes to make for dinner and dessert that we can all enjoy. We discovered the website http://www.skinnytaste.com which has incredible recipes that each have weight watchers points and full nutritional information listed. First make this recipe and then go check it out!

strawberry rhubarb crisp

Image

Adapted from Skinny Taste

For the filling:
  • 1 lb strawberries, hulled and quartered
  • 1 lb rhubarb stalks (about 5 or 6) cut into 1 inch pieces
  • 1/2 orange, zested and juiced
  • 1 tbsp cornstarch
  • 1/4 cup agave nectar or honey
For the Topping:
  • 1 cup Quaker oats (I used old fashioned rolled oats)
  • 1/2 cup 100% white whole wheat flour (I used all whole wheat)
  • 1/2 cup light brown sugar, not packed
  • 1/2 tsp cinnamon
  • 1/4 cup butter, melted

Directions:

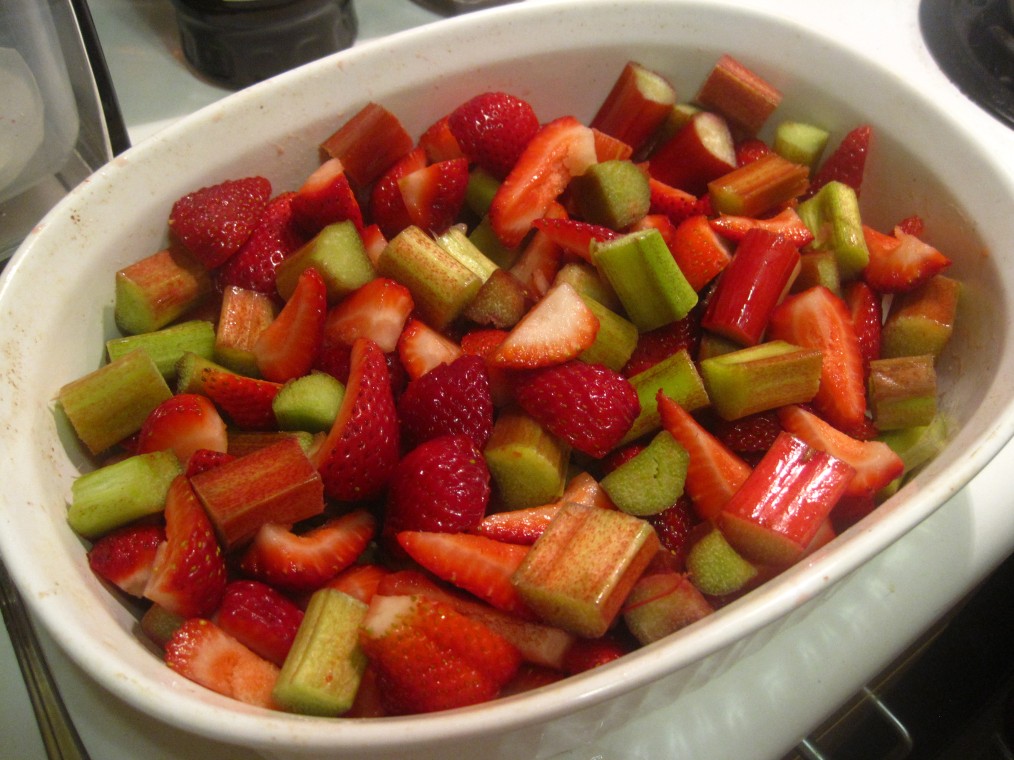
Heat oven to 375 degrees. Combine strawberries and rhubarb in an oven safe dish.Image

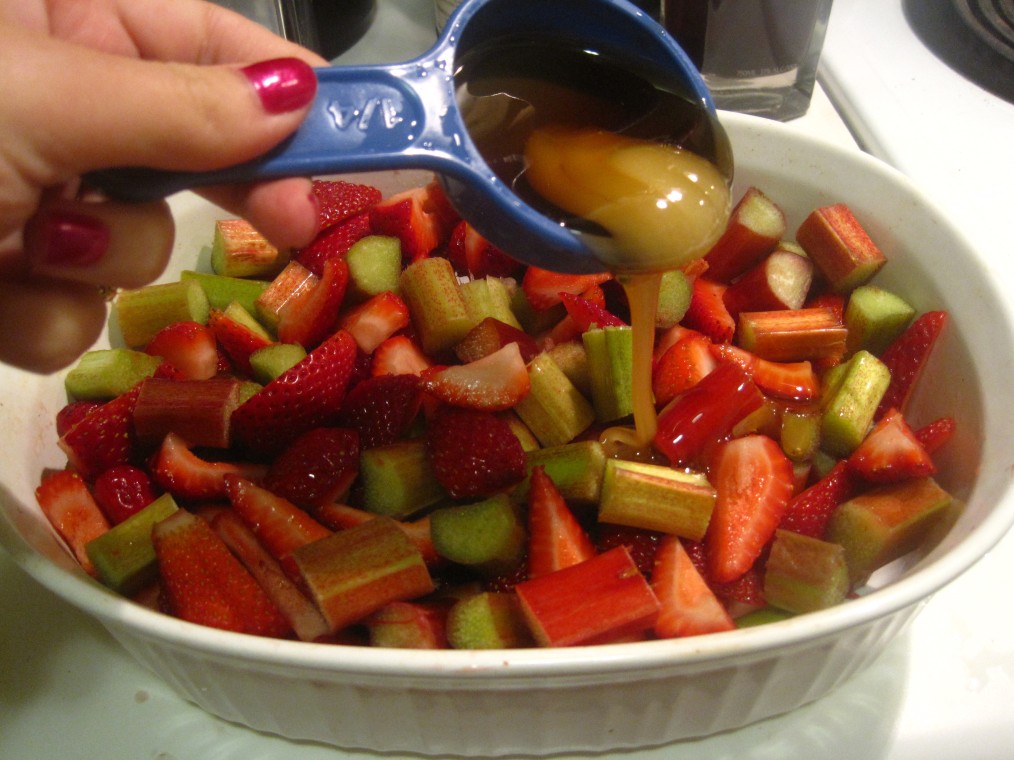
Add agave nectar (or honey)…Image

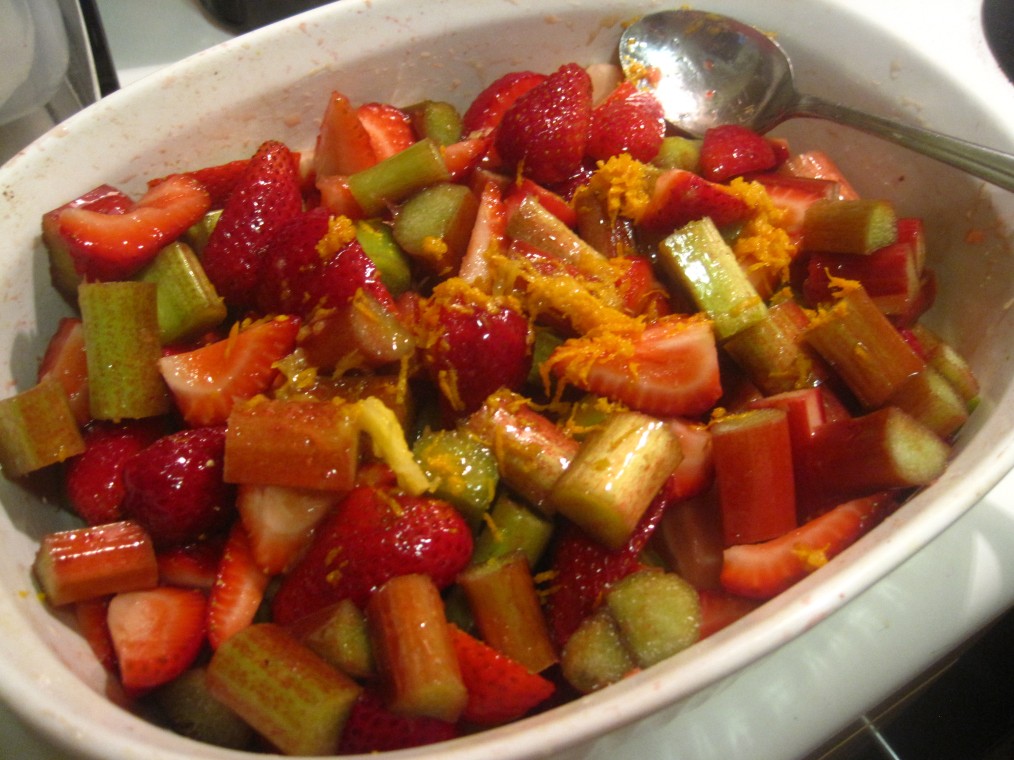
Then orange juice and orange zest; sprinkle with cornstarch and toss until fruit is well coated.Image

Mix remaining ingredients for the topping in a medium bowl then spread over fruit.ImageImage

Bake until topping is golden brown and fruit is bubbling, about 40 minutes.Image

Serve with vanilla froyo, whipped cream, or eat it alone!

Bon Appetit,

E

easy crab cakes

At school this past fall I took a class called Food for Contemporary Living in the nutrition department. It was my dream class. I got to spend 3 hours cooking in a food lab every Tuesday afternoon. Each class focused on a different food group: fruits and vegetables, whole grains, seafood, milk and egg foams, and many others. Each student was responsible for preparing a recipe, and then at the end of class we got to sample a bit of each dish and complete sensory evaluations. Our “textbook” was the red Betty Crocker cookbook, which had some surprisingly good recipes, including the one I am going to share with you today.

I was so amazed by these crab cakes in class because I had never tried canned crab before and didn’t know it could be so delicious. These are light and fluffy, and filled with flavor. They don’t taste fishy at all, have great spice from the ground mustard and a nice crunch from the scallion whites. I haven’t tried it yet, but I bet these would be great with tuna or salmon as well. As you can see, I served them with my favorite roasted asparagus and a nice glass of white wine.

crab cakes 

Adapted from Betty Crocker, serves 4

Ingredients:

  • 1/3 cup mayonnaise or salad dressing
  • 1 large egg
  • 1 ¼ cups soft bread crumbs (about 2 slices bread, I used whole wheat)
  • 1 tsp ground mustard
  • ¼ tsp salt
  • 1/8 tsp cayenne
  • 1/8 tsp pepper
  • 2 medium green onions, chopped- 2 Tbsp
  • 3 cans (6 oz) crabmeat, well drained, cartilage cartilage removed and flaked
  • ¼ cup dry bread crumbs
  • 2 Tbsp vegetable oil
Directions:
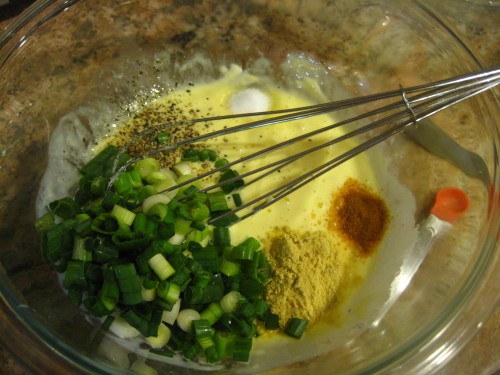
In medium bowl, mix mayo and egg with wire whisk. Stir in remaining ingredients except oil and dry bread crumbs.
Shape mixture into 6 patties, about 3 inches in diameter (mixture will be moist). Coat each patty with dry bread crumbs.
In 12-inch nonstick skillet, heat oil over medium heat. Cook patties in oil about 10 minutes, gently turning once, until golden brown and hot in center. Reduce heat if crab cakes become brown too quickly, as you can see one of mine did. 
Bon appetit!

summer dining: greek style mixed grill kebobs and pine nut orzo salad

It is hard to believe that it’s June already, and summer is just around the corner! Summer has always been my favorite season for a multitude of reasons: my birthday, no school, picnics, barbecues, swimming in outdoor pools, running and biking along the Hudson, lightweight colorful dresses, fresh and simple outdoor meals, farmers market trips, the list goes on!

Today I am going to share with you a delicious meal that is a perfect excuse to dust off your grill and outdoor dining set and invite some friends over for an al fresco dinner!

greek style mixed grill kebobs and pine nut orzo salad

Sourced from Rachael Ray, Serves 4

Ingredients for kebobs:

  • 4 cloves garlic, grated or minced
  • 4 sprigs fresh oregano, leaves stripped and finely chopped
  • 6 sprigs fresh rosemary, leaves stripped and finely chopped
  • 1/4 cup green olive tapenade
  • 1 teaspoon crushed red pepper flakes
  • 2 lemons, juiced and 1 zested
  • 1/3 plus 1/4 cup extra virgin olive oil, divided
  • 1 1/2 pounds firm white flesh fish, halibut or swordfish, cut into 12 (2-inch) chunks (I used shrimp instead)
  • 2 pounds boneless, skinless chicken breast, cut into 12 (2-inch) chunks
  • Black pepper
Ingredients for orzo salad:
  • 1/4 cup pine nuts, lightly toasted
  • 1 small red onion, finely chopped
  • 1/2 cup flat-leaf parsley, finely chopped
  • 1 cup feta cheese crumbles
  • 8 Greek hot peppers, for garnish
  • 1/4 cup kalamata olives, for garnish
  • 2 tomatoes, diced, for garnish
  • 1/2 cucumber, diced, for garnish

Directions:

Preheat grill pan or outdoor grill to medium high. If using wooden skewers, soak them in water to prevent burning.

Place a pot of water on the stove and bring to a boil for the pasta salad. When the water boils, salt it and cook the pasta to al dente.

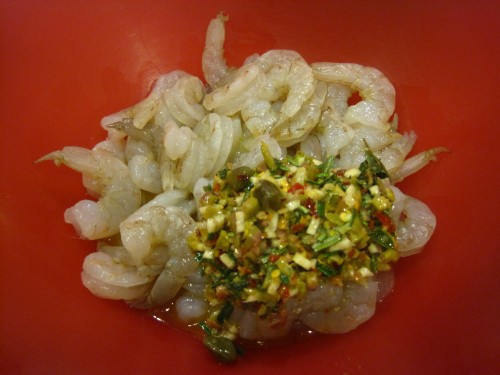
While the pasta cooks, in a small bowl combine the garlic, oregano, rosemary, tapenade, red pepper flakes, 1 tablespoon lemon zest and the juice of 1 lemon with about 1/3 cup olive oil. 

Place the fish and chicken in separate shallow dishes or bowls and season with salt and pepper then divide the dressing between the bowls and coat the fish and chicken evenly.

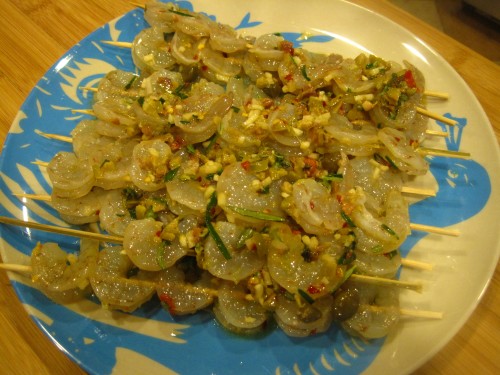
Skewer the fish and chicken on metal or soaked wooden skewers.

Grill the chicken 10 to 12 minutes until firm and juices run clear, and the fish for about 6 to 8 minutes, turning the kabobs frequently.

Drain orzo and combine with pine nuts, onions, parsley, feta crumbles, the juice of 1 lemon, about 1/4 cup extra-virgin olive oil, salt and pepper.

Serve the orzo salad with 3 pieces each of chicken and fish along side. Garnish plates with a couple of hot peppers, olives, tomatoes and cucumbers on each plate.

I didn’t get a picture of a finished plate because it was so delicious that we dug in immediately, but you should be able to get an idea from the pictures I took while cooking that this was an absolutely delectable meal. The shrimp/chicken were packed with flavor from the tapenade, fresh herbs, spices and lemon juice, and the orzo salad was so light and fresh from the cucumbers, feta, tomatoes and had a nice crunch from the pine nuts. That salad alone would make an excellent addition to any picnic.

Bon appetit!

muffins and mimosas: a foolproof guide to brunch, part one

A snapshot of my most recent brunch table

For me, brunch is its very own food group. I just love everything about it. I love muffins, scones, and frittatas. I love how naughty it feels to drink mimosas, bellinis, and bloody marys so early in the day. I really think that people are just generally more fun to be around in the hours between 11am and 2pm on Saturdays and Sundays (not to say that you can’t technically have brunch any other day of the week). I have many favorite brunch establishments in NYC, Boston and Ithaca, which is a post for another time, but in this series I will walk you through how to host a scrumptious brunch at home! The key is having some favorite recipes (and a stocked pantry) on hand so you can throw together impromptu brunches whenever you get the itch.

To get you started I will refer you back to some great brunch recipes that I’ve already posted on Edie’s Eats: Popovers, lemon topped raspberry muffins, rhubarb compote, granola, and apple bread.

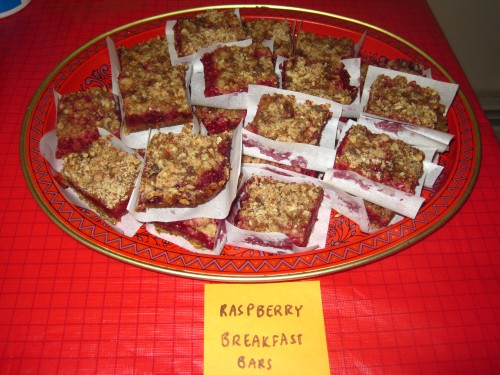
But without further ado, I will get started with my new OBSESSION. These raspberry breakfast oat bars are absolutely incredible. They have a crunchy, nutty crust and topping with a sweet and sour filling from fresh raspberries. No joke, they flew off the table at my most recent brunch almost immediately. Go buy the ingredients for this NOW, you won’t regret it.

raspberry breakfast bars

recipe from Smitten Kitchen

For the crust and crumb:
1 1/2 cups all-purpose flour
1 cup firmly packed dark brown sugar
1 1/4 cups rolled oats
3/4 teaspoon salt
3/4 teaspoon baking powder
1/2 teaspoon baking soda
1/2 teaspoon cinnamon
3/4 cup (1 1/2 sticks) unsalted butter, cut into 1-inch pieces

For the raspberry filling:
1/4 cup firmly packed dark brown sugar
1 tablespoon grated lemon zest
1/2 teaspoon cinnamon
2 tablespoons all-purpose flour
1 pound raspberries, fresh or frozen
1/4 cup fresh lemon juice
2 tablespoons unsalted butter, melted and cooled

Make the crust and crumb: Preheat the oven to 350°F. Butter the bottom and sides of a 9-by-13-inch glass or light-colored metal baking pan. Put a long piece of parchment paper in the bottom of the pan, letting the parchment extend up the two short sides of the pan and overhang slightly on both ends. (This will make it easy to remove the bars from the pan after they have baked.) Butter the parchment.

Put the flour, brown sugar, oats, salt, baking powder, baking soda, and cinnamon in a food processor.

Pulse in short bursts until combined. Add the butter and pulse until loose crumbs form.

Reserve 1 1/2 cup of the mixture and set aside. Pour the rest of the mixture into the prepared pan and use your hans or the back of a large wooden spoon to push the crust into an even layer at the bottom of the pan. The crust should touch the sides of the pan. Bake until golden brown, 12 to 15 minutes. Transfer to a wire rack and let the crust cool. Keep the oven on while you make the raspberry filling.

Make the raspberry filling: In a medium bowl, whisk the sugar, lemon zest, cinnamon and flour together. Add the raspberries, lemon juice and butter and use your hands to toss gently until the raspberries are evenly coated.

Assemble and bake the bars: Spread the raspberry filling evenly on top of the cooled crust. Sprinkle the reserved crust mixture evenly on top of the filling.

Bake for 35 to 45 minutes, rotating the pan every 15 minutes, until the top is golden brown and the filling starts to bubble around the edges.

Transfer to a wire rack to cool completely, then cut into squares and serve. The bars can be stored in the refrigerator in an airtight container for up to two days.

There are more great brunch recipes to come, so please check back soon! Bon Appetit!

easy popovers

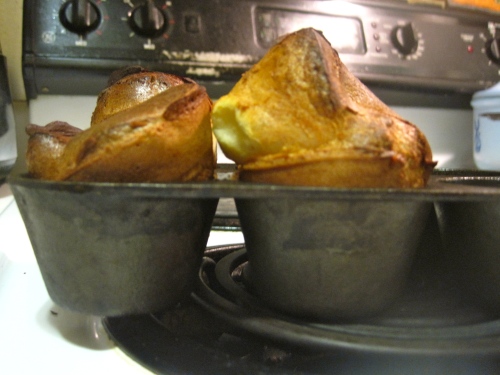
Popover Cafe on Amsterdam Ave between 86th and 87th streets in New York City is one of my go-to brunch spots. I just can’t get enough of their signature popovers–warm, and eggy on the inside, with a nice crust on the outside, and a big air hole that acts as the perfect vessel for strawberry butter, apple butter, or your favorite spread.

I decided that it was time to try and make popovers at home (how hard could it possibly be, right?), so that I don’t have to schlep up to the upper west side every time a craving hits.

I searched on the internet for an easy recipe and it’s unbelievable how much variety there is! Different amounts of flour, salt, eggs, and annoying un-even measurements. I found this recipe and treasured it for it’s simplicity. I have renamed it the 3-2-1 Popover because the breakdown of ingredients reminded me of the classic 1-2-3-4 cake.

Turns out, it’s unbelievably easy, and almost fool proof to make these at home. If you have a popover pan, great, but a muffin tin will work perfectly fine as well.

3-2-1 Popovers

Sourced from The Food Network

Ingredients:

  • 3 tablespoons melted butter, divided
  • 2 eggs
  • 1 cup milk, warmed for 30 seconds in the microwave (should be lukewarm to warm)
  • 1 cup all-purpose flour
  • 1 teaspoon kosher salt

Directions:

Preheat the oven to 400 degrees F.

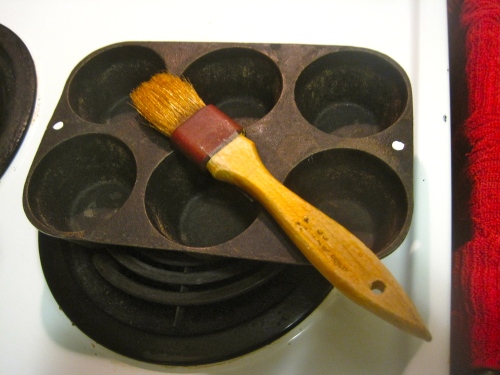
Using a pastry brush, coat 8 muffin cups with 1 tablespoon of the melted butter and put the tin in the oven for 5 minutes. 

Meanwhile, mix the eggs in a blender until light yellow. Add the warmed milk and blend. Add the flour, salt and remaining melted butter, and blend until smooth.

Pour the batter into the warmed muffin tin and return it to the oven to bake until golden, about 35 minutes. Note: DO NOT OPEN THE OVEN DOOR TO PEEK! You want to keep as much heat in the oven as you can. You can and should turn on  your oven light to keep an eye on them to make sure they aren’t burning though. I would start looking at 30 minutes. 

Remove from the oven and serve warm. 

We ate them with some of the random spreads we had in the fridge: 

They were absolutely delicious! As you can see, these are very quick and easy to make, and they look extremely impressive. Don’t reserve these for a special occasion, make them for breakfast today!

eataly!

There are no words.

It changed my life.

I don’t know how I had managed to stay away this long, but in December my mom and I spent a lovely afternoon strolling around the store, examining every shelf, and sharing some delicious foccacia. 

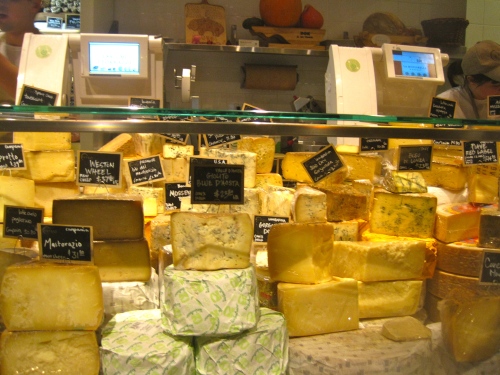
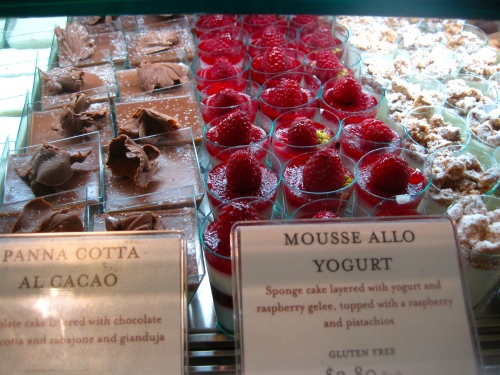
Not only can you dine at 10 different restaurants under one roof, but you can also buy the freshest fish, many varieties of fresh pasta, hearty, crusty italian bread, big hunks of cheese, fresh herbs, fruits and vegetables, beautifully presented cheeses (yes, more cheese), delicious, perfect pastries, people making mozzarella in front of you, and hundreds of varieties of olive oil. If you haven’t been yet, get to NYC and get yourself to 200 5th avenue at 23rd street immediately!

thai night: coconut-curry mussels and peanut rice noodle salad

When I was home over winter break my mom asked me to help her make a nice gluten free meal for our cousins who were coming over for dinner (one of them has celiac).

Pretty table setting

Cheese plate

We looked at food blogs and magazines for inspiration before finally landing on an article in Food Network Magazine which provided us with the recipes for this delicious dinner.

I really love mussels, and almost always order them if they’re on the menu at a restaurant, but I don’t make them at home very often for no reason at all. In fact, I am going to start making them more often because they are inexpensive, incredibly quick and easy to make, and impressive to boot!

The peanut noodle salad is also very yummy. The rice noodles aren’t too filling, the peanut sauce is savory and a little salty, and the veggies give a nice crunch. It’s also a nice compliment to the spicy mussels.

Coconut-Curry Mussels

Courtesy of Food Network Magazine

Serves: 6

Ingredients:

  • 2 stalks lemongrass
  • 4 tablespoons vegetable oil
  • 2 medium red onions, thinly sliced
  • 6 cloves garlic, thinly sliced
  • 6 tablespoons chopped peeled ginger
  • 1/4 cup green curry paste (use less if you don’t want it very spicy)
  • 2 15-ounce cans coconut milk
  • 4 tablespoons fish sauce
  • 6 pounds mussels, scrubbed and debearded
  • 4 limes, halved
  • 1 cup chopped fresh cilantro
  • Crusty bread, for serving (optional but DO IT)

Directions:

Trim the lemongrass, leaving 6 inches at the root end; discard the tops. Smash the stalks with the flat side of a knife and cut into 1-inch pieces.

Mise en place: all ingredients prepped and ready to go!

Heat 2 tablespoons vegetable oil in each of 2 large pots over medium-high heat. Add 1 sliced onion to each and cook, stirring, until soft, about 5 minutes. Add half each of the garlic, lemongrass, ginger and curry paste to each pot and cook, stirring, until golden, about 2 minutes.

Add 1 can coconut milk, 2 tablespoons fish sauce and 1/4 cup water to each pot and bring to a simmer. Divide the mussels between the pots; cover and cook, stirring occasionally, until the mussels open, about 8 minutes. (Discard any that do not open.) Add the juice of 2 limes to each pot, then add the lime halves. Stir 1/2 cup cilantro into each. Serve with bread, if desired.

Peanut Rice Noodle Salad

Courtesy of Food Network Magazine

Serves: 6

Ingredients:

  • 8 ounces rice vermicelli noodles
  • 6 tablespoons fresh lime juice
  • 3 tablespoons low-sodium soy sauce (use tamari if you need it to be GF)
  • 3 tablespoons creamy peanut butter
  • 3 tablespoons packed dark brown sugar
  • 3 tablespoons vegetable oil
  • 1 small red bell pepper, thinly sliced
  • 1/2 cup sliced scallions
  • 1/2 cup roughly chopped fresh basil
  • 1/2 cup roughly chopped fresh cilantro
  • 1/2 cup roughly chopped fresh mint
  • Kosher salt
  • 1/3 cup salted roasted peanuts, roughly chopped

Directions:

Put the noodles in a large bowl and cover with boiling water. Let the noodles soak until tender, about 10 minutes; drain and rinse under cold water until cool. Transfer to a serving bowl.

Whisk the lime juice, soy sauce, peanut butter, brown sugar and vegetable oil in a medium bowl until smooth. Pour the dressing over the noodles. Add the bell pepper, scallions, basil, cilantro and mint and toss to combine. Season with salt and sprinkle with the peanuts.

Final product!

even Zara had a good time 🙂

Bon appetit!